About a year ago I completely re-did (ok, not really... but it looks like it!) an IKEA Malm dresser that I had and made it oh so much better. At least in my opinion. And everyone who I showed it to. (Please don't tell me they were all lying, my confidence couldn't take the hit).
The inspiration came from Pinterest or Google Images or somewhere else fantastic.
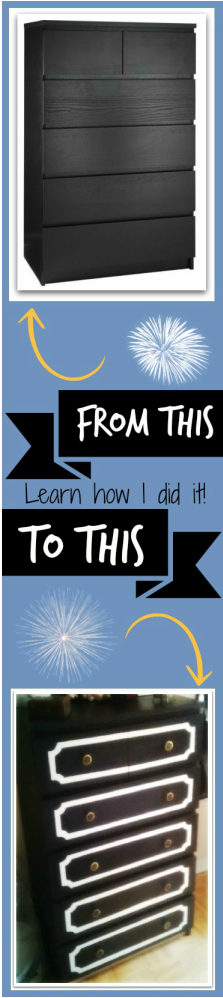
It's pretty easy and I'll show you how I did it. Here is a stock photo of the dresser next to my creation.
The inspiration came from Pinterest or Google Images or somewhere else fantastic.
It's pretty easy and I'll show you how I did it. Here is a stock photo of the dresser next to my creation.
** Obviously, you'll need an IKEA Malm dresser or something similar. There are many items available online (e.g. Amazon , Craigslist, etc.) or maybe you already have something plain that you want to dress up at home. This also will likely work for smaller dressers, wider dresser, or anything remotely similar to this. **
Alright! Ready to go?
Materials
- IKEA Malm dresser or equivalent
- Fine-grit sandpaper (120 - 180 is good)
- Paint
- Foam or bristle paint brush
- Drawer pulls
- Painter's tape
- A drop cloth or spill clean-up plan
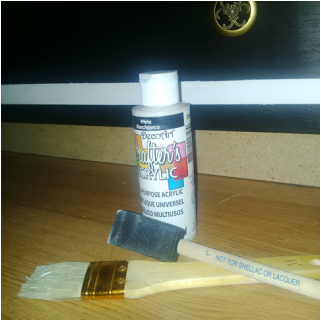
The paint that I used was DecoArt craft acrylic. They are inexpensive and fantastic. I absolutely love them and use them whenever I can for a variety of projects. If it's a craft project and I don't need a ceramic paint -- these babies are my go-to. And I am so not paid to say that: I really really love them. I've used them for years and years.
Anywho! Once you have all of your materials ready, set them up and take a poor-quality picture.
Anywho! Once you have all of your materials ready, set them up and take a poor-quality picture.
Psyche. Here's what you really need to do:
Methods
1. .Determine the design that you want to apply to your drawer fronts. I found various inspirational pictures on the web before deciding on the one I did. There are also templates available, but I simply sketched out my design on a small sheet before transferring it onto the dresser in chalk. I sat back, looked it over, and made adjustments as necessary.
Call it a childhood obsession, but oh how I love chalk!
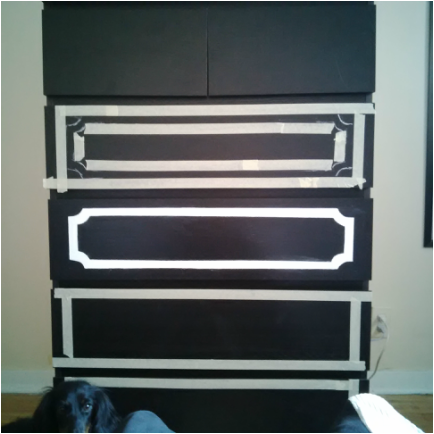
2. Once your design has been decided and transferred to your drawer fronts in chalk, before to tape off the outline. Use small pieces of tape for the curves to help keep the edges flat and prevent paint from bleeding through once you paint.
I, of course, never took a "before" picture and forgot to take an "in progress" picture until I had already finished painting my first trial drawer. But, you can sort of see all three steps of the process here, which is awesome! ... And the top of my miniature dachshund's head. Ardi says hi... and scorns DIYing for taking my attention from him =)
Methods
1. .Determine the design that you want to apply to your drawer fronts. I found various inspirational pictures on the web before deciding on the one I did. There are also templates available, but I simply sketched out my design on a small sheet before transferring it onto the dresser in chalk. I sat back, looked it over, and made adjustments as necessary.
Call it a childhood obsession, but oh how I love chalk!
2. Once your design has been decided and transferred to your drawer fronts in chalk, before to tape off the outline. Use small pieces of tape for the curves to help keep the edges flat and prevent paint from bleeding through once you paint.
I, of course, never took a "before" picture and forgot to take an "in progress" picture until I had already finished painting my first trial drawer. But, you can sort of see all three steps of the process here, which is awesome! ... And the top of my miniature dachshund's head. Ardi says hi... and scorns DIYing for taking my attention from him =)
3. Once your tape is securely in place and outlining your template, sand the area down with a fine-grit sandpaper. I honestly did not do this step because I am a bad, bad girl and shouldn't be allowed to DIY. By sanding down the area, it helps the paint to adhere to the surface because these dressers tend to have a rather slick finish on them.
Note: Thus far my paint has help up well, even through a move. I would still recommend a quick sand, though.
4. Wipe away the dust with a lint-free rag (T-shirt rags!) and/or vacuum.
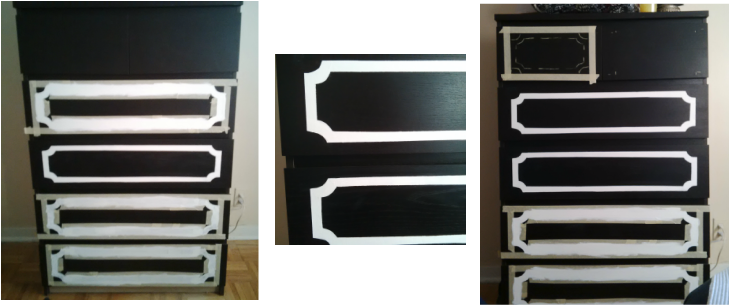
5. Paint! Try to use long strokes in the same direction and keep it (as) neat (as you can)!
6. Let the paint settle for a several minutes before pulling up the tape. I trotted off halfway through this and did something else, totally forgetting about the poor thing. So I pulled some of my tape up when the paint was dry. No harm, no foul. I think.
Note: Thus far my paint has help up well, even through a move. I would still recommend a quick sand, though.
4. Wipe away the dust with a lint-free rag (T-shirt rags!) and/or vacuum.
5. Paint! Try to use long strokes in the same direction and keep it (as) neat (as you can)!
6. Let the paint settle for a several minutes before pulling up the tape. I trotted off halfway through this and did something else, totally forgetting about the poor thing. So I pulled some of my tape up when the paint was dry. No harm, no foul. I think.
7. Mark the points where you want your hardware to go and then remove the drawers to drill holes for the new hardware (I don't have a picture of this step, sorry!).
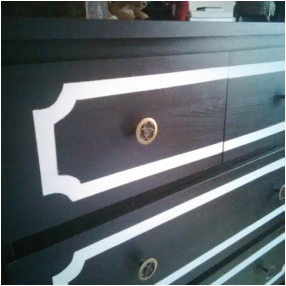
8. Attach hardware, return the drawers, sit back, and admire your transformation!
The entire thing cost me $13 after taxes with the small paint bottle costing me $1 at the dollar store and the drawer hardware costing me $2 a piece for 10 pieces. I already had the painter's tape on-hand and the same with the chalk, but if you didn't that'd be another $4 or so. $17 for a dressed up dresser. Not bad at all!
 RSS Feed

