This post is all about a very simple pillow cover technique: envelope covers!
When I say that they are super easy, I mean it. Especially if you are able to make it all out of a single length of fabric. However, if a single long length of fabric is simply not possible or not favourable given your pillow dimensions, then this pillow is also easy to make from three (3) separate pieces.
So, what are we waiting for? Let's go!

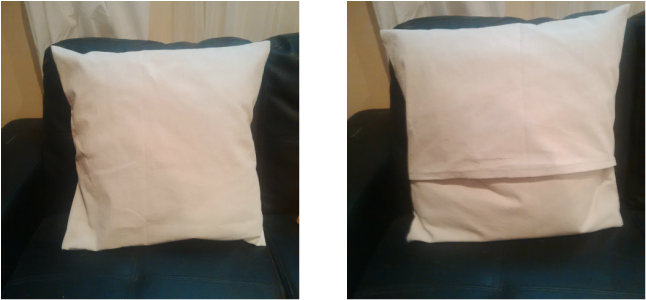
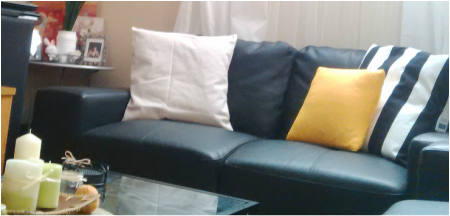
Two envelope pillows that I made, sitting on my couch! The light beige is 14in square, the striped one is 18in square.
For this mini-tutorial I will show you how to make an 18in square pillow, just like the black-and-white striped pillow in the above picture. Even so, I have made all sorts of pillow sizes using this method: 20x30, 30x55, 14x14, 10x20.
Ready to make your own?
Materials
Methods
1. It is always a good idea to pre-wash your fabrics to account for shrinkage. I never do, but really, don't follow my example
.2. Lay your (pre-washed) fabric out on a flat surface to work on. On the wrong side of the fabric measure out the width of your pillow form, 18in x 18in for this tutorial, and outline a strip of fabric that is the width of your pillow +1in and the length of your pillow x2.5. For me, that meant that my strip of fabric measured out at about 19in width and 45in length. You can mark this with fabric chalk or regular old chalk like Crayola chalk, or even a pencil.
3. Cut out this outline once you have double (triple!) checked your measurements.
Ready to make your own?
Materials
- Fabric
(fabric width of your pillow width + 1in (19in here) and a fabric length of your pillow width x 2.5 (45in here) - Sewing machine or a hand-sewing needle
- Fabric Scissors
- Coordinating thread
- A pillow to cover!
- *Optional: Pinking Scissors
Methods
1. It is always a good idea to pre-wash your fabrics to account for shrinkage. I never do, but really, don't follow my example
.2. Lay your (pre-washed) fabric out on a flat surface to work on. On the wrong side of the fabric measure out the width of your pillow form, 18in x 18in for this tutorial, and outline a strip of fabric that is the width of your pillow +1in and the length of your pillow x2.5. For me, that meant that my strip of fabric measured out at about 19in width and 45in length. You can mark this with fabric chalk or regular old chalk like Crayola chalk, or even a pencil.
3. Cut out this outline once you have double (triple!) checked your measurements.
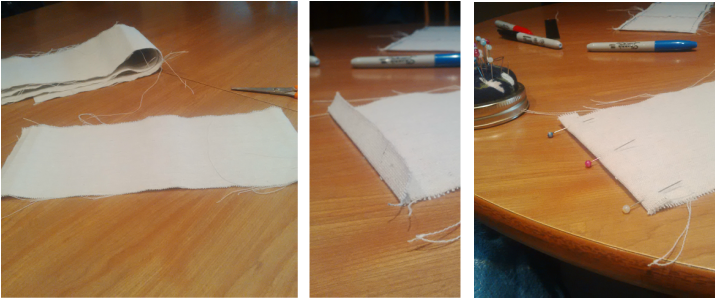
Cut out your fabric. Fold over the short ends twice by 0.5in each time to cover raw ends. Pin and sew.
4. Fold over the short ends of the fabric strip by 0.5in, then again by another 0.5in to hide the raw ends. Pin down and sew. These will be the finished flaps of your envelope. At this stage, you make also want to use a serger, pinking scissors, or a zig-zag stitch to finish the long ends of the fabric strip and prevent frayingl. I'm bad: I always wait until the very end (if I remember to do it at all, yikes).
5. Bring your fabric strip back to your workspace and find the centre of your fabric strip. Measure out and mark 1/2 your pillow width in either direction, drawing a line in chalk or pencil down the width of the strip. Again, for me this meant 9in each way. This gives me the centre panel or the front of your pillow form at 18in. The two 'side' panels are what will make up the envelope of the pillow.
5. Bring your fabric strip back to your workspace and find the centre of your fabric strip. Measure out and mark 1/2 your pillow width in either direction, drawing a line in chalk or pencil down the width of the strip. Again, for me this meant 9in each way. This gives me the centre panel or the front of your pillow form at 18in. The two 'side' panels are what will make up the envelope of the pillow.
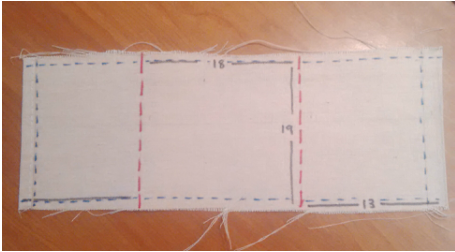
The blue dashed lines are my 'margins': from where I would have folded over and hemmed the short ends, as well as where I will sew my side seams.
The red dashed line marks my centre panel. Once I see it, I know I have folded my side panel enough!
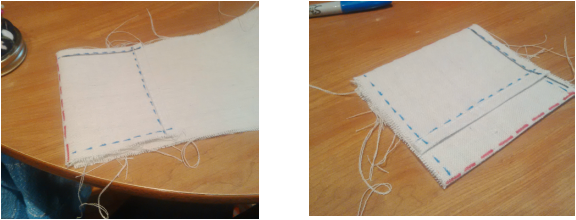
6. Flip the fabric strip over so that the right side is facing you. Fold over the ends of the strip until you see the marks you made to outline your centre panel. The ends should overlap. This is the envelope of your pillow. Pin down the open sides of the folded-up fabric. These will be your side seams.
7. Take the folded and pinned fabric to your machine and sew the side seams closed with a 0.5in margin.
8. If you haven't already, finish the raw fabric at the edge of the seams now. (Or don't, whatevs).
9. Flip your pillow inside out, and VOILA! Pure beauty.
7. Take the folded and pinned fabric to your machine and sew the side seams closed with a 0.5in margin.
8. If you haven't already, finish the raw fabric at the edge of the seams now. (Or don't, whatevs).
9. Flip your pillow inside out, and VOILA! Pure beauty.
Side note: You can jazz up the envelope by adding buttons, ribbons, or other accessories -- and the envelope doesn't have to be the back of the pillow, either! Have fun with it~
I hope that you liked my mini-tutorial. I have these covered pillows all over the place, because they are really easy and it beats spending $50 to buy a throw pillow. My strategy: buy cheap (and often ugly) pillow forms online (links below) or in some budget stores like IKEA or Wal-Mart, or thrift store pillows. If you go the thrift store pillow route, please wash them to heck first! I know most of them are already washed before they are put up for sale, but still. Better safe than sorry!
Please leave comments if you have feedback and/or if you tried it out yourself!
 RSS Feed

